Important this page is REALLY old and no longer represents the current version of django report builder. I'll leave it here until it can be replaced. Your contributions are very welcome.
How To Use Django-Report-Builder
Django-SIS is a good example integration of report_builder. Note we've given report_builder a grappelli theme by modifying templates.
Access the admin report builder site (/report_builder). The following report builder dashboard screen appears:
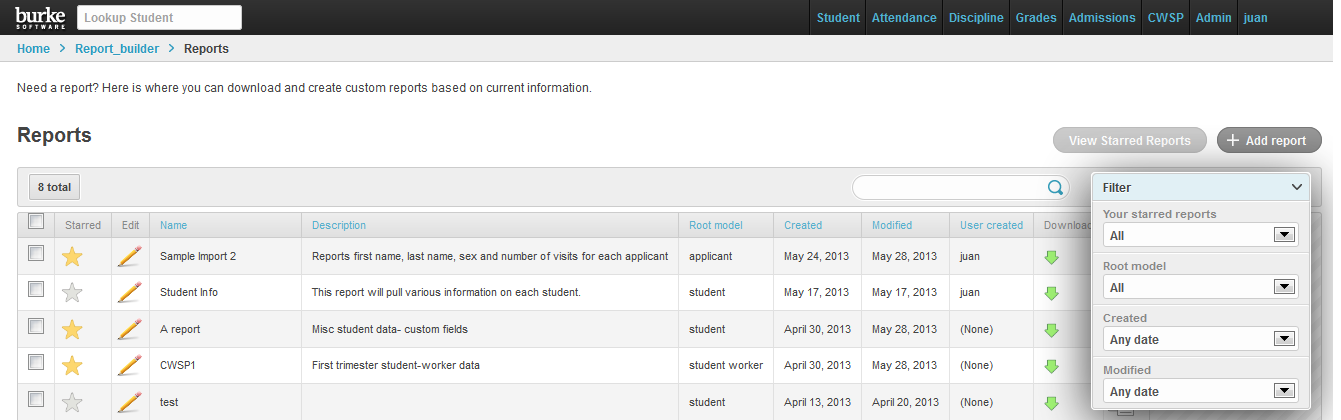
This dashboard will allow the user to view any reports that have previously been created. Additionally, users will have the option of utilizing the available filter to quickly access, sort, and view previous reports by status, date, and root model.
Starred Reports are utilized to mark important reports, or reports that will be frequently generated. Users may quickly sort the dash to view only starred reports by selecting the View Starred Reports button located towards the top of the dashboard.
Creating a New Report
From the report builder main screen described above, select Add Report located at the top right-hand corner of the dash. The Add Report screen displays- name and root model (students, applicants, workers, etc.) are required fields.
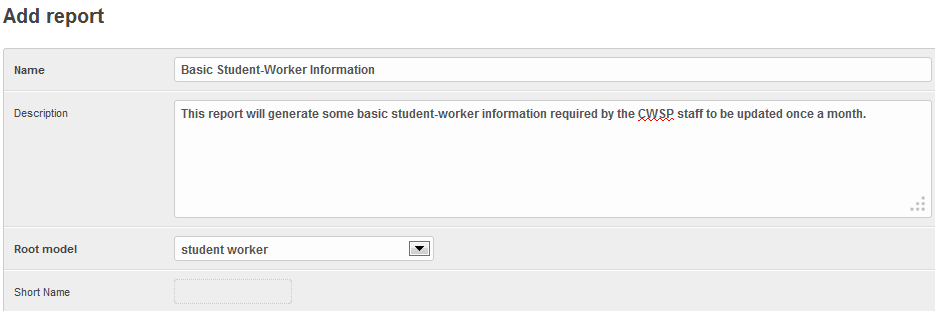
It may also be helpful to include an extended description as shown above to provide other users with a more clear direction of how the report is used. Once the information has been entered, select Save Your newly created report will now show as the most recent report in the dash, where you can then edit accordingly:

Editing a Report
All created reports have the option of being edited. Using the newly created report from above, to begin editing, select the pencil icon located under the Edit column by the respective report, in this instance: Basic Student-Worker Information.
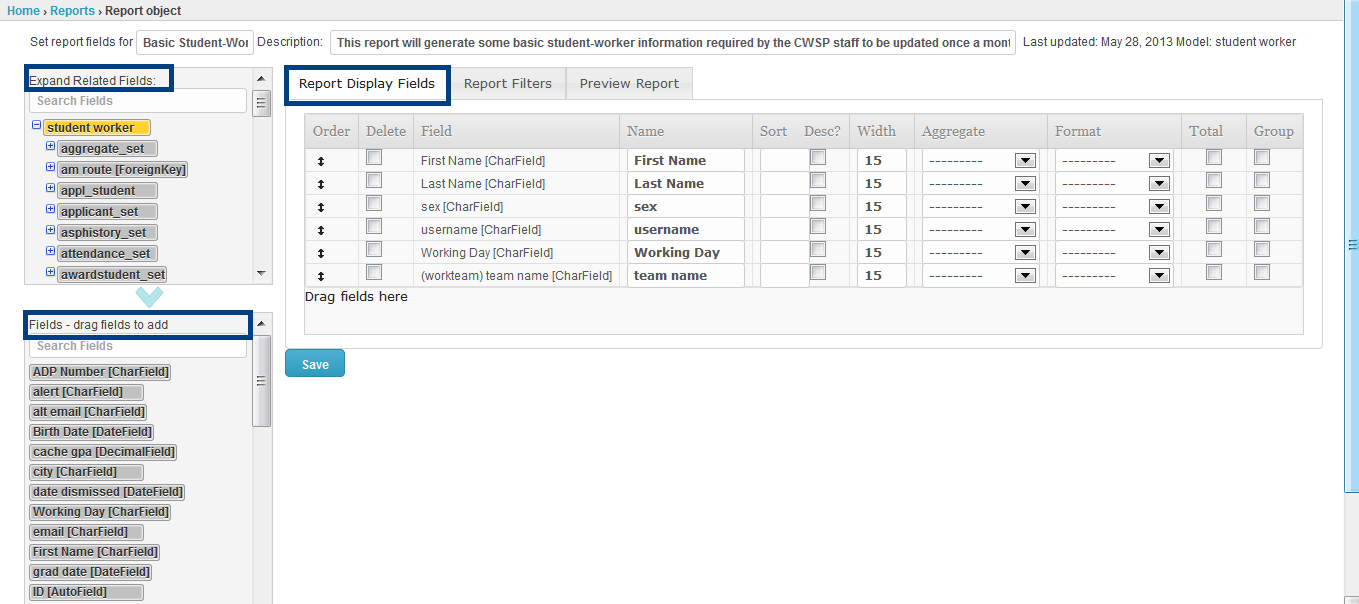
With the Report Display Fields tab selected, click and drag the fields from the list of available options located at the bottom-left side of the screen into the empty area located directly to the right while the appropiate tab is still selected. Save your selection.
Note: The Expand Related Fields field located in the box above the current fields list allows users to access expanded fields/information. Selecting one option will generate the expanded fields in the box below where you can then drag and drop into the space available accordingly.
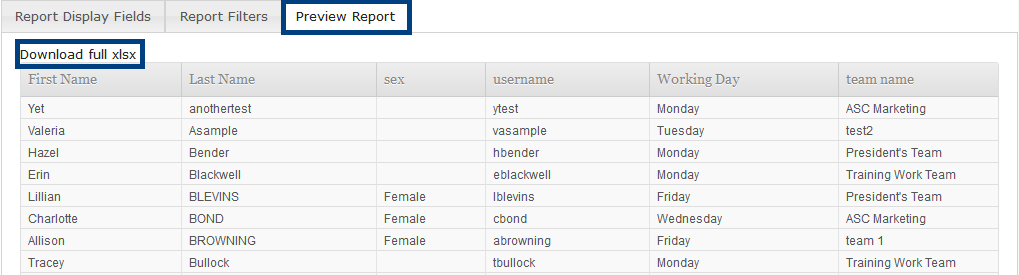
After dragging your specified fields and saving, users then have the option to preview the report by selecting the Preview Report tab. This will generate a preview, where users can then export into an Excel/Libre-Calc document, as shown below:
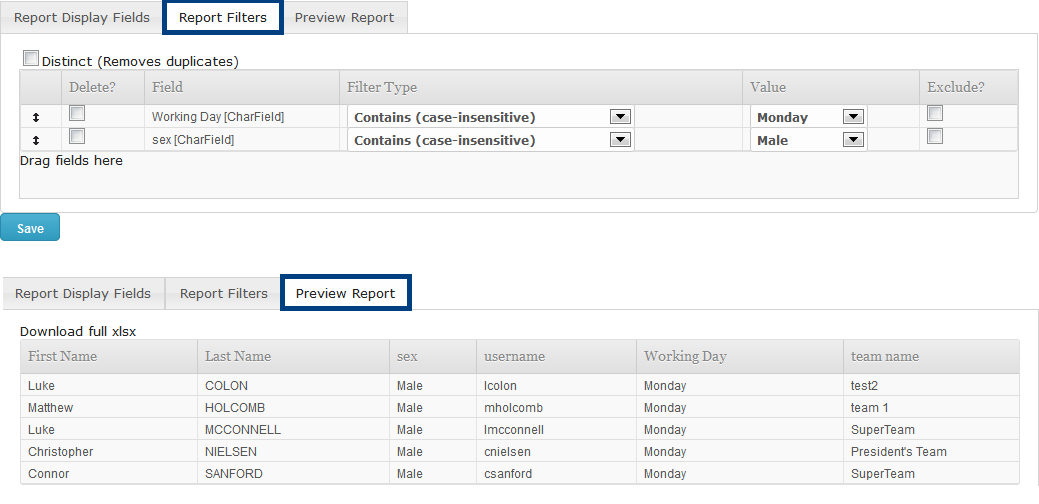
Using the Report Filters Tab
The Report Filters option is designed to give users the ability to further refine their data. Refining information functions similiar to editing your report, simply select the Report Filters tab and use the available fields list to drag and drop into the empty area.
Using the example above, consider the use case of a user wanting to pull the student-worker data from before, but only for males working on Mondays.
- Drag and drop Working day and sex into the open area as shown below.
- Under the value header, select Monday, and Male accordingly.
- Click Save then enter preview tab to view and download into Excel.